

Installing insulation in interior walls is a fantastic way to enhance your home’s comfort and quietness. The basic process involves measuring wall cavities, cutting insulation batts (like fiberglass or mineral wool) slightly larger than the space, fitting them snugly between studs without compressing them, and sealing any gaps. This DIY project can significantly reduce noise transfer between rooms and help maintain consistent temperatures, making your living spaces more enjoyable.
Why Insulate Interior Walls in Your Springfield Home?
Many homeowners in Springfield focus on exterior insulation, but insulating your interior walls offers just as many benefits—if not more! It’s not just about maintaining a comfortable temperature; it’s about enhancing energy efficiency, reducing noise, and creating a more peaceful, cozy living space. Whether you’re looking to cut down on energy costs, improve soundproofing, or add an extra layer of comfort, our professional insulation services can help.
- Soundproofing: This is often the primary reason. Interior wall insulation significantly dampens sound transmission between rooms. Say goodbye to hearing conversations, TVs, or footsteps from adjacent spaces. Perfect for home offices, nurseries, bedrooms, or entertainment rooms.
- Increased Thermal Comfort: While not as critical as exterior insulation for overall home energy savings, insulating interior walls helps maintain more consistent temperatures between different rooms or zones within your house. A room adjacent to a rarely used space won’t feel as cold, for instance.
- Potential Energy Savings: In homes with zoned heating/cooling systems, insulating interior walls can prevent conditioned air from easily transferring to unconditioned or differently zoned areas, potentially improving efficiency.
- Enhanced Privacy: Reduced noise naturally leads to increased privacy between rooms.
- Added Home Value: Features like improved soundproofing and comfort can be attractive selling points for potential buyers in the competitive Springfield market.
Understanding Insulation Types for Interior Walls
Choosing the right insulation material is crucial for achieving your goals, especially if soundproofing is a priority. Common options suitable for interior walls include:
- Fiberglass Batts: The most common and generally cost-effective option. Available in pre-cut batts designed to fit standard stud spacing. Comes faced (with a paper or foil vapor barrier – less common for interior) or unfaced. Good thermal performance, decent sound dampening. Learn more about fiberglass batts.
- Mineral Wool/Rockwool Batts: Denser than fiberglass, offering superior soundproofing qualities and excellent fire resistance. Also moisture-resistant. Often the preferred choice when noise reduction is the main goal.
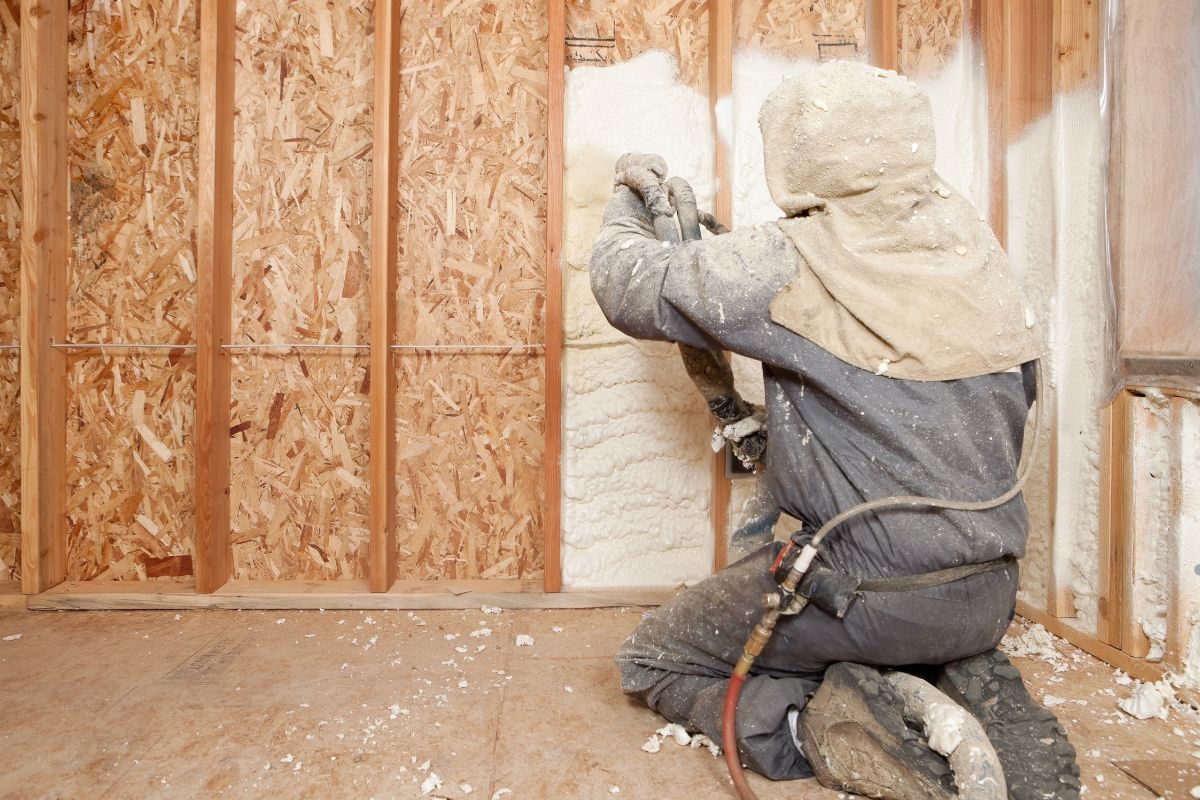
- Cellulose/Blown-in: Primarily used for insulating existing closed walls, as it requires special equipment to blow into the cavities. Can be effective but is less common for DIY installation in open walls.
While R-value (thermal resistance) is important for exterior walls, for interior walls, the Sound Transmission Class (STC) rating is often more relevant if noise control is your aim. Higher STC ratings mean better sound blocking. Mineral wool typically has a higher STC rating than standard fiberglass.
Gathering Your Tools and Materials
Before you begin, gather everything you need. Proper preparation makes the job smoother and safer.
Tools:
- Utility Knife (with plenty of sharp blades)
- Tape Measure
- Straight Edge or Framing Square (for guiding cuts)
- Staple Gun (Heavy-duty, if using faced insulation)
- Ladder or Step Stool (if needed)
Safety Gear (Essential!):
- Work Gloves (Heavy-duty)
- Safety Glasses or Goggles
- Dust Mask or Respirator (N95 recommended, especially for fiberglass/mineral wool)
- Long-sleeved Shirt and Pants
Materials:
- Insulation Batts (Correct size and type for your stud spacing and goals)
- Staples (If using faced batts)
- Acoustic Sealant/Caulk (for sealing gaps)
- Optional: Vapor Barrier (rarely needed for standard interior walls, but check local Springfield building codes, especially for bathrooms/high moisture areas)
Proper insulation installation is key to maximizing energy efficiency and soundproofing in your home. Avoid compressing fiberglass or mineral wool, as this reduces its R-value by eliminating the air pockets that provide insulation. It should fit snugly without being tightly packed. When cutting around pipes, wires, and electrical boxes, take your time to ensure a precise fit—leaving gaps or compressing material can compromise performance. For complex installations, working with experienced professionals ensures the job is done right. Call us today for expert insulation services in Springfield!
Safety First: Essential Precautions
Working with insulation requires care to protect yourself. Always prioritize safety:
- Wear Your PPE: Always wear gloves, eye protection, and a dust mask or respirator. Insulation fibers can irritate skin, eyes, and lungs.
- Handle Carefully: Minimize agitation of the insulation material to reduce airborne fibers.
- Electrical Safety: If working near electrical wiring or boxes, turn off the corresponding circuit breakers at your main panel first. Never cut into or compress wiring.Review basic electrical safety guidelines before starting.
- Ventilation: Ensure the work area is reasonably well-ventilated, especially if working in a confined space.
- Clean Up: Clean up dust and debris promptly using a vacuum with a HEPA filter if possible.
Adhering to these simple safety steps ensures a smoother and hazard-free installation process.
Step-by-Step: Installing Insulation in Open Wall Cavities
This guide focuses on installing batts in walls where the studs are exposed (new construction or renovation).
- Measure the Cavities: Measure the height and width of each stud bay (the space between studs). Standard stud spacing is typically 16 inches or 24 inches on center, and insulation batts are sized accordingly. Measure the depth of the studs (e.g., 3.5″ for 2×4 walls, 5.5″ for 2×6 walls) to ensure you get the right thickness.
- Cut the Insulation (If Necessary):
- Roll out the insulation batt on a flat surface like plywood on sawhorses.
- Measure and mark your required length. Add about ½ inch to the length for a snug fit vertically.
- Place a straight edge along your mark. Compress the insulation with the straight edge and cut cleanly along it with a sharp utility knife. Change blades often for easier cutting.
- For width, batts are usually pre-sized. If you have non-standard spacing, cut the batt about 1 inch wider than the cavity opening.
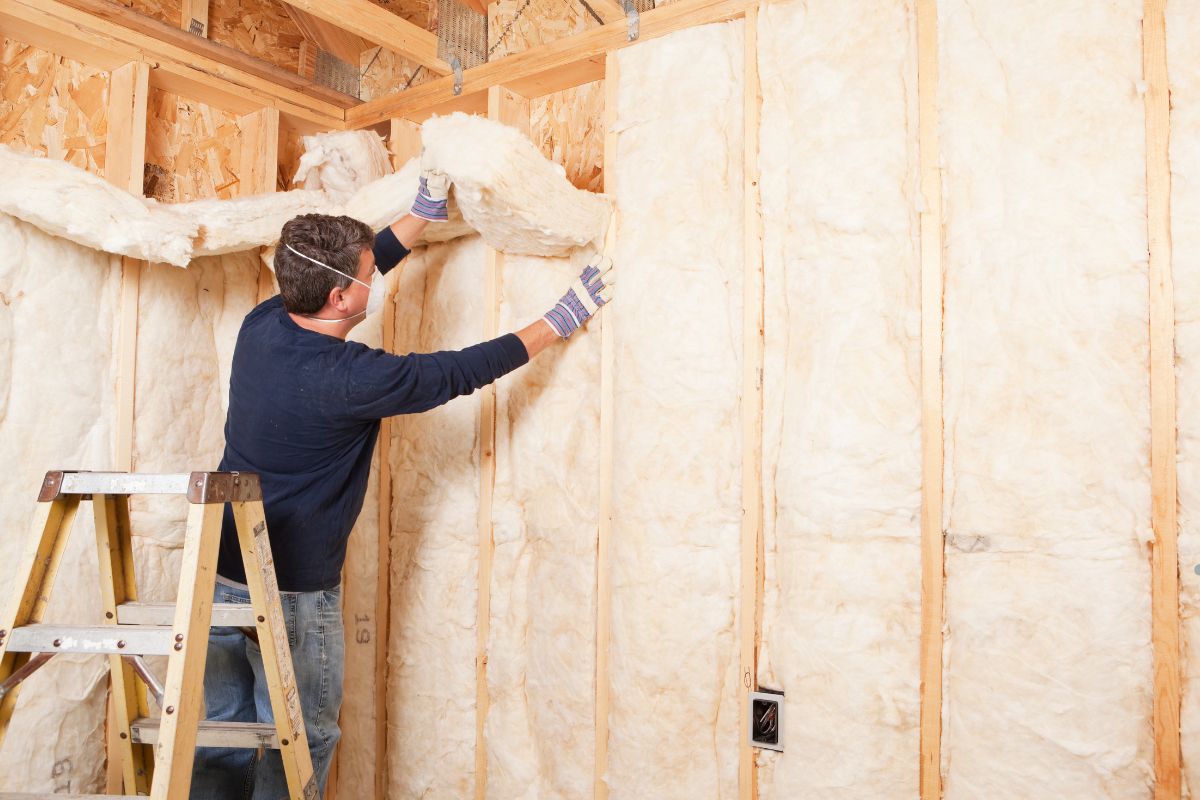
- Fit the Insulation:
- Unfaced Batts: Gently push the batt into the stud cavity. It should fit snugly against the studs on all sides through friction alone. Ensure it fills the entire cavity depth without being overly compressed.
- Faced Batts: Place the batt into the cavity with the paper/foil facing towards the living space (the side that will be warmer in winter – though less critical for interior walls). The flanges should overlap the face of the studs.
- Secure the Insulation (Faced Batts Only): Staple the flanges to the face or sides of the studs every 8-12 inches. Keep the facing smooth and avoid excessive stapling that tears the paper.
- Work Around Obstructions: Carefully cut the insulation to fit snugly around electrical boxes, pipes, and wiring. Do not compress insulation behind pipes or wires. Cut small slits or pieces as needed to fill gaps around these items without compression.
- Ensure Full Coverage: Check that the insulation fills the cavity completely from top to bottom and side to side, leaving no gaps. Gaps reduce both thermal and sound performance.
Avoid compressing the insulation! Compressing fiberglass or mineral wool reduces its R-value and sound-dampening ability by squeezing out the trapped air pockets that do the insulating work. It should fit snugly, not tightly packed.
Addressing Challenges: Existing Walls & Obstructions
Insulating walls that are already covered with drywall presents different challenges.
- Existing Walls: The most common method is blown-in insulation (cellulose or fiberglass). This involves drilling small holes in the drywall between each stud pair (usually near the top) and using specialized equipment to blow the insulation into the cavity. This is typically not a DIY project and requires professional equipment and expertise. If you need existing walls insulated in Springfield, it’s best to consult professionals.Get expert professional help in Springfield for existing wall insulation.
- Obstructions: As mentioned, cutting carefully around pipes, wires, and boxes is essential. For complex plumbing or wiring configurations, take your time to cut smaller insulation pieces to fit around them accurately without leaving gaps or compressing the material or wiring.
Finishing Up: Sealing and Preparation for Drywall
Once the insulation batts are installed, a few final steps ensure optimal performance:
- Seal Air Gaps: Use acoustic sealant or caulk to seal any small gaps where insulation meets studs, top/bottom plates, or around electrical boxes and pipes. This step is particularly important for maximizing soundproofing performance by blocking airborne noise paths. Find out more about the benefits of acoustic sealant.
- Vapor Barrier Check: For most standard interior walls in a climate like Springfield’s, a separate vapor barrier (like plastic sheeting) is not necessary and often not recommended, as it can potentially trap moisture. Faced insulation provides a vapor retarder, but even that isn’t critical internally unless it’s a bathroom, sauna, or other high-moisture area. Always check current Springfield building codes or consult a professional if unsure.
- Final Inspection: Do a final check of all cavities to ensure insulation is snug, uncompressed, and fills the space completely with no gaps.
Your walls are now insulated and ready for drywall installation!
When to Call Insulation Professionals in Springfield
While installing batt insulation in open walls can be a manageable DIY project, there are times when calling in the professionals is the smarter choice:
- Existing/Closed Walls: As mentioned, this requires specialized blown-in techniques and equipment.
- Large or Complex Projects: Insulating an entire house or dealing with unusual framing or numerous obstructions can be time-consuming and challenging.
- Lack of Time or Tools: If you don’t have the time or prefer not to invest in the necessary tools and safety gear.
- Ensuring Optimal Performance: Professionals have the experience to ensure insulation is installed perfectly without compression or gaps, maximizing its effectiveness.
- Code Compliance: Experts are familiar with local Springfield building codes regarding insulation types, R-values (if applicable), and vapor barriers.
Ensure a flawless insulation installation with experienced professionals! Hiring skilled installers guarantees efficiency, safety, and long-lasting results for your home. Call us now to connect with Springfield’s top insulation experts!
Frequently Asked Questions (FAQs)
Do interior walls really need insulation?
While not structurally required like exterior insulation, insulating interior walls is highly recommended for significantly improving soundproofing between rooms and enhancing overall room-to-room comfort. It adds a layer of privacy and quiet enjoyment to your home.
What’s the best insulation for soundproofing?
Mineral wool (Rockwool) is generally considered the best common batt insulation for soundproofing interior walls due to its higher density compared to standard fiberglass. It’s very effective at absorbing sound waves and reducing noise transmission.
Can I use faced insulation on interior walls?
Yes, you can use faced insulation (with a paper or foil facing), but the vapor barrier aspect is typically not needed for standard interior walls between conditioned rooms. Some find the flanges on faced batts make stapling easier, but unfaced batts installed via friction fit work perfectly well and avoid creating an unnecessary internal vapor barrier. Check local codes for specific areas like bathrooms.
How much does it cost to insulate interior walls in Springfield?
The Cost to insulate interior walls in Springfield varies based on several factors:
- DIY vs. Professional: DIY saves on labor but requires buying tools/materials. Professional installation includes labor and materials but ensures proper installation.
- Insulation Type: Mineral wool is generally more expensive than fiberglass.
- Project Size: The square footage of walls being insulated.
- Accessibility: Open studs are much easier (and cheaper) than retrofitting existing walls.
- Labor Rates: Labor costs in the Springfield area can vary, so it’s best to get a personalized quote for your home. DIY insulation materials typically range from $0.50 to $1.50+ per square foot, while professional installation comes at a higher cost but ensures expert results. Contact us today for a customized estimate!